.zrdn-hide-print{
display:none;
}
.zrdn_five
{
background-position-y: 2px;
}
.zrdn_four_half
{
background-position-y: -16px;
}
.zrdn_four
{
background-position-y: -35px;
}
.zrdn_three_half
{
background-position-y: -54px;
}
.zrdn_three
{
background-position-y: -75px;
}
.zrdn_two_half
{
background-position-y: -93px;
}
.zrdn_two
{
background-position-y: -111px;
}
.zrdn_one_half
{
background-position-y: -129px;
}
.zrdn_one
{
background-position-y: -150px;
}
.zrdn_zero
{
background-position-y: -168px;
}
#zlrecipe-title{border-bottom: 1px solid #000; font-weight: bold; font-size: 2em;
line-height: 1.3em; padding-bottom: 0.5em;
font-family:Georgia, "Times New Roman", Times, serif;;
}
.zlrecipe-print-link {float: right; margin-top: 5px;}
#zrdn-recipe-container{ padding:10px}
.zlrecipe-print-link a { background: url(https://recette.thermomagazine.org/wp-content/plugins/zip-recipes/images/print.png ) no-repeat scroll 0 4px transparent;
cursor: pointer;
padding: 0 0 0 20px;
display: block;
height: 20px;
color:#b72f2f;
}
#zlrecipe-category, #zlrecipe-cuisine, #zlrecipe-trans_fat, #zlrecipe-cholesterol, #zlrecipe-fiber, #zlrecipe-sodium, #zlrecipe-sugar, #zlrecipe-protein, #zlrecipe-protein, #zlrecipe-carbs, #zlrecipe-saturated-fat, #zlrecipe-fat, #zlrecipe-calories, #zrdn__author, #zlrecipe-total-time, #zlrecipe-prep-time, #zlrecipe-cook-time, #zlrecipe-yield, #zlrecipe-serving-size {line-height: 1.2em;
margin: 1em 0; font-size:14px;
font-weight: bold;}
#zlrecipe-category span, #zlrecipe-cuisine span, #zlrecipe-trans_fat span, #zlrecipe-cholesterol span, #zlrecipe-fiber span, #zlrecipe-sodium span, #zlrecipe-sugar span, #zlrecipe-protein span, #zlrecipe-protein span, #zlrecipe-carbs span, #zlrecipe-saturated-fat span, #zlrecipe-fat span, #zlrecipe-calories span, #zrdn__author span, #zlrecipe-total-time span, #zlrecipe-prep-time span, #zlrecipe-cook-time span, #zlrecipe-yield span, #zlrecipe-serving-size span{font-weight: normal; display:block}
.zlmeta .width-50{ width:50%; float:left}
#zlrecipe-summary { padding: 0 10px 10px;}
#zlrecipe-summary .summary{ margin: 10px 0; font-style: italic; line-height: 1.2em; font-size: 16px; font-family: 'Open Sans', sans-serif;}
#zlrecipe-ingredients, #zlrecipe-instructions{ font-weight: bold; font-size: 1.25em; line-height: 1.2em; margin: 1em 0; padding-bottom:1em;}
#zlrecipe-ingredients-list, #zlrecipe-instructions-list{padding:0px;line-height: 1.2em; font-size: 1.1em;
}
.ingredient.no-bullet {list-style-type: none; padding: 0 0 0 2.4em; margin: 1em;}
#zlrecipe-instructions-list li{
text-align:left;
}
#zlrecipe-instructions-list .instruction {margin: 0 1em; list-style-type: decimal;}
#zlrecipe-instructions-list {color: #000;padding:0px; margin: 0 0 24px 0;padding-left: 10px;}
#zlrecipe-ingredients-list{color: #000;padding-left: 10px;line-height: 1.3em;}
#zlrecipe-ingredients-list li{padding-left: 0; text-align: left; padding-bottom:5px;margin:0px; }
#zrdn-recipe-container .hide-card{
display: none;
}
#zlrecipe-summary{
clear: both;
}
#zrdn-recipe-container .h-4 { font-size: 1.25em; font-weight: bold; }
.ziprecipes-plugin { display: none; }
#zl-printed-copyright-statement, #zl-printed-permalink { display: none; }
.amp-ad-wrapper {text-align: center}
.amp_ad_5{margin-left: auto; margin-right: auto;}
#amp-user-notification1 p { display: inline-block; margin: 20px 0px; }
#amp-user-notification1 { padding: 5px; text-align: center; background: #fff; border-top: 1px solid #005be2; }
amp-user-notification button { padding: 8px 10px; background: red; color: #fff; margin-left: 5px; border: 0; }
amp-user-notification a{background:red;}
amp-web-push-widget button.amp-subscribe {
display: inline-flex;
align-items: center;
border-radius: 5px;
border: 0;
box-sizing: border-box;
margin: 0;
padding: 10px 15px;
cursor: pointer;
outline: none;
font-size: 15px;
font-weight: 500;
background: #4A90E2;
margin-top: 7px;
color: white;
box-shadow: 0 1px 1px 0 rgba(0, 0, 0, 0.5);
-webkit-tap-highlight-color: rgba(0, 0, 0, 0);
}
Pajvar dans le Thermomix il y a 5 ans
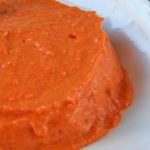
Pajvar dans le Thermomix Si vous aimez innover dans la cuisine et que vous aimez préparer des plats d’autres cuisines du monde, vous serez peut-être intéressé à découvrir la recette que nous voulons maintenant vous présenter. Plus précisément, nous allons vous apprendre à préparer le pajvar dans le Thermomix. Cette recette appelle aux aubergines
Pajvar dans le Thermomix
C’est un plat originaire de Turquie qui peut être défini comme un pâté
Temps de cuisson
55 minutes
Ingrédients Afin de préparer cette recette dont nous traitons maintenant, en particulier quatre portions, vous devez savoir que vous devez avoir les produits suivants: 800 grammes d'aubergines. 1 kilo de poivrons rouges. 60 grammes d'huile d'olive. 1 gousse d'ail. 20 grammes de vinaigre. Sel au goût. Instructions Une fois que vous avez acheté tous ces produits, suivez ces instructions: Épluchez l'ail et coupez-le en plusieurs morceaux pour réserver. Placez les aubergines et les poivrons sur une plaque et placez-la au four préalablement préchauffé à 200 °. Plus précisément, vous devez les conserver pendant environ 50 minutes. Lorsque ce temps est écoulé, sortez le plateau et laissez refroidir ces légumes. Quand ils le font, épluchez-les et coupez-les en morceaux. Versez les aubergines, les poivrons, l'ail et les autres ingrédients dans le verre du robot. Programmez le Thermomix à la vitesse 6 pendant 1 minute. Versez le mélange obtenu dans un récipient et placez-le au réfrigérateur pour que le pajvar soit frais au moment de servir.
Que pensez-vous de cette recette? Oserez-vous y arriver?
