.zrdn-hide-print{
display:none;
}
.zrdn_five
{
background-position-y: 2px;
}
.zrdn_four_half
{
background-position-y: -16px;
}
.zrdn_four
{
background-position-y: -35px;
}
.zrdn_three_half
{
background-position-y: -54px;
}
.zrdn_three
{
background-position-y: -75px;
}
.zrdn_two_half
{
background-position-y: -93px;
}
.zrdn_two
{
background-position-y: -111px;
}
.zrdn_one_half
{
background-position-y: -129px;
}
.zrdn_one
{
background-position-y: -150px;
}
.zrdn_zero
{
background-position-y: -168px;
}
#zlrecipe-title{border-bottom: 1px solid #000; font-weight: bold; font-size: 2em;
line-height: 1.3em; padding-bottom: 0.5em;
font-family:Georgia, "Times New Roman", Times, serif;;
}
.zlrecipe-print-link {float: right; margin-top: 5px;}
#zrdn-recipe-container{ padding:10px}
.zlrecipe-print-link a { background: url(https://recette.thermomagazine.org/wp-content/plugins/zip-recipes/images/print.png ) no-repeat scroll 0 4px transparent;
cursor: pointer;
padding: 0 0 0 20px;
display: block;
height: 20px;
color:#b72f2f;
}
#zlrecipe-category, #zlrecipe-cuisine, #zlrecipe-trans_fat, #zlrecipe-cholesterol, #zlrecipe-fiber, #zlrecipe-sodium, #zlrecipe-sugar, #zlrecipe-protein, #zlrecipe-protein, #zlrecipe-carbs, #zlrecipe-saturated-fat, #zlrecipe-fat, #zlrecipe-calories, #zrdn__author, #zlrecipe-total-time, #zlrecipe-prep-time, #zlrecipe-cook-time, #zlrecipe-yield, #zlrecipe-serving-size {line-height: 1.2em;
margin: 1em 0; font-size:14px;
font-weight: bold;}
#zlrecipe-category span, #zlrecipe-cuisine span, #zlrecipe-trans_fat span, #zlrecipe-cholesterol span, #zlrecipe-fiber span, #zlrecipe-sodium span, #zlrecipe-sugar span, #zlrecipe-protein span, #zlrecipe-protein span, #zlrecipe-carbs span, #zlrecipe-saturated-fat span, #zlrecipe-fat span, #zlrecipe-calories span, #zrdn__author span, #zlrecipe-total-time span, #zlrecipe-prep-time span, #zlrecipe-cook-time span, #zlrecipe-yield span, #zlrecipe-serving-size span{font-weight: normal; display:block}
.zlmeta .width-50{ width:50%; float:left}
#zlrecipe-summary { padding: 0 10px 10px;}
#zlrecipe-summary .summary{ margin: 10px 0; font-style: italic; line-height: 1.2em; font-size: 16px; font-family: 'Open Sans', sans-serif;}
#zlrecipe-ingredients, #zlrecipe-instructions{ font-weight: bold; font-size: 1.25em; line-height: 1.2em; margin: 1em 0; padding-bottom:1em;}
#zlrecipe-ingredients-list, #zlrecipe-instructions-list{padding:0px;line-height: 1.2em; font-size: 1.1em;
}
.ingredient.no-bullet {list-style-type: none; padding: 0 0 0 2.4em; margin: 1em;}
#zlrecipe-instructions-list li{
text-align:left;
}
#zlrecipe-instructions-list .instruction {margin: 0 1em; list-style-type: decimal;}
#zlrecipe-instructions-list {color: #000;padding:0px; margin: 0 0 24px 0;padding-left: 10px;}
#zlrecipe-ingredients-list{color: #000;padding-left: 10px;line-height: 1.3em;}
#zlrecipe-ingredients-list li{padding-left: 0; text-align: left; padding-bottom:5px;margin:0px; }
#zrdn-recipe-container .hide-card{
display: none;
}
#zlrecipe-summary{
clear: both;
}
#zrdn-recipe-container .h-4 { font-size: 1.25em; font-weight: bold; }
.ziprecipes-plugin { display: none; }
#zl-printed-copyright-statement, #zl-printed-permalink { display: none; }
.amp-ad-wrapper {text-align: center}
.amp_ad_5{margin-left: auto; margin-right: auto;}
#amp-user-notification1 p { display: inline-block; margin: 20px 0px; }
#amp-user-notification1 { padding: 5px; text-align: center; background: #fff; border-top: 1px solid #005be2; }
amp-user-notification button { padding: 8px 10px; background: red; color: #fff; margin-left: 5px; border: 0; }
amp-user-notification a{background:red;}
amp-web-push-widget button.amp-subscribe {
display: inline-flex;
align-items: center;
border-radius: 5px;
border: 0;
box-sizing: border-box;
margin: 0;
padding: 10px 15px;
cursor: pointer;
outline: none;
font-size: 15px;
font-weight: 500;
background: #4A90E2;
margin-top: 7px;
color: white;
box-shadow: 0 1px 1px 0 rgba(0, 0, 0, 0.5);
-webkit-tap-highlight-color: rgba(0, 0, 0, 0);
}
Petit gâteau magique à la vanille avec Thermomix il y a 6 ans
Petit gâteau magique à la vanille avec Thermomix
Petit gâteau magique à la vanille avec Thermomix
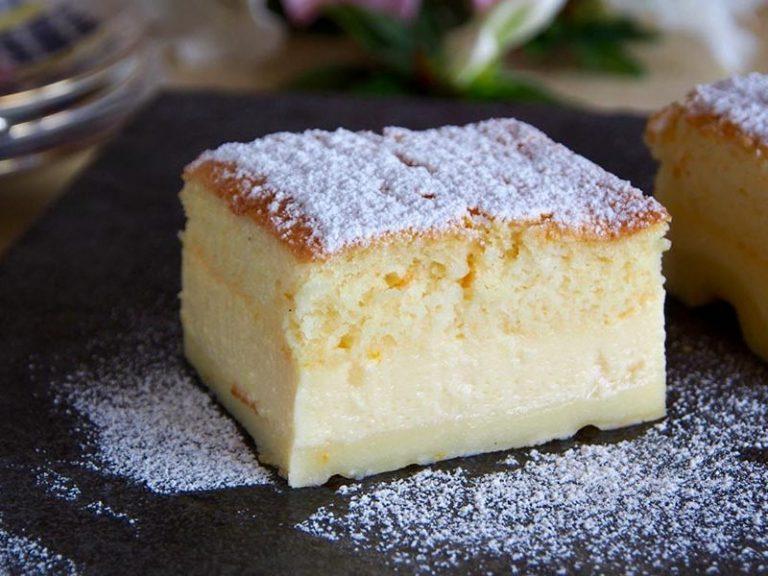
Le gâteau magique à la vanille était d’origine française et provenait plus précisément du sud-ouest, en particulier des Charentes.
Nous vous montrons comment faire le gâteau magique à la vanille.
Ingrédients 500 grammes de lait entier 1 gousse de vanille 4 oeufs 120 grammes de sucre 15 grammes de sucre vanillé 1 cuillère à café d'eau 115 grammes de farine 125 grammes de beurre le sel Instructions Mettez 500 grammes de lait entier et 1 gousse de vanille divisée en 2 sur le Thermomix. 8 min / 70 ° C / vitesse 2 Transférer le contenu du Thermomix dans un récipient recouvert d’un film plastique et réserver. Lavez et séchez le récipient Thermomix. Ajoutez le papillon à battre. Ajoutez 4 œufs (seulement les jaunes), 120 grammes de sucre en poudre, 15 grammes de sucre vanillé et 1 cuillère à café d’eau dans le Thermomix. Mélanger 3 min / vitesse 4 Ajoutez 125 grammes de beurre dans un bol. Faites fondre le beurre au micro-ondes (ou dans une casserole) et ajoutez-le dans le bol Thermomix. Mélanger 2 min 30 s / vitesse Retirez le papillon, ajoutez 115 grammes de farine et 1 pincée de sel dans le Thermomix. Mélanger 15 sec / vitesse 5 Ajoutez le lait que vous aviez réservé (sans la gousse de vanille). Mélanger 30 sec / vitesse 5 Transférez le contenu du Thermomix dans un récipient et mettez-le de côté. Lavez et séchez le récipient Thermomix. Ajoutez les 4 blancs d'œufs et 1 pincée de sel au Thermomix. Ajouter le papillon à battre et mélanger 3 min / vitesse 3.5 Retirez le papillon, mélangez les blancs préparés 3 fois en remuant délicatement à la spatule. Il doit rester en morceaux, c’est ce qui permettra au gâteau d’obtenir 3 couches différentes. Beurrer un moule à perdre (Ø 20 cm). Versez la préparation dans le moule, puis tapotez-la sur la surface de travail pour faire sortir les bulles d'air. Mettre au four 50 min à 150 ° C Réservez jusqu'à ce qu'il soit refroidi. Réservez au réfrigérateur pendant 2 h 00 min

